1. 使用Feign调用服务接口
在Java中,进行项目开发基本都是模块划分,划分模块之后,就需要进行接口的调用。那么该如何进行接口的调用呢??
HttpClient
HttpClient提供了高效的、最新的、功能丰富的支持Http协议的客户端编程工具包。
HttpClient相比传统JDK自带的URLConnection,提升了易用性和灵活性,使客户端发送HTTP请求变得容易,提高了开发的效率。
OkHttp
一个处理网络请求的开源项目,是安卓端最火的轻量级框架,OkHttp拥有简洁的API、高效的性能,并支持多种协议(Http和SPDY)。
HttpURLConnection
HttpURLConnection 是Java的标准类,它继承自URLConnection,可用于向网站发送GET请求、POST请求。HttpURLConnection使用比较复杂,不像HttpClient那样容易使用。
RestTemplate
RestTemplate 是Spring 提供的用于访问Rest 服务的客户端,RestTemplate提供了多种便捷访问远程Http 服务的方法,能够大大提高客户端的编写效率。
上面介绍了最常见的几种接口调用方法,下面要介绍的Feign更加简单、方便。
Feign 是一个声明式的REST客户端,它能够让REST调用更加简单。Feign提供了HTTP请求的模板,通过编写简单的接口和插入注解,就可以定义好HTTP请求的参数、格式、地址等信息。
Feign会完全代理HTTP请求,我们只需要像调用方法一样调用它就可以完成服务请求及相关处理。
并且,Feign可以与Eureka 和Ribbon组合使用以支持负载均衡。
1.1 在 Spring Cloud 中集成Feign
下面通过一个简单的案例去描述Feign接口调用的一个简单过程:
需求:
将模块feign-interface和feign-invoke注册到注册中心,在feign-invoke模块中调用feign-interface中的接口。
首先需要创建一个模块eureka-server作为注册中心,并配置上security的安全框架。因为在我博客上已经写有Eureka服务注册中心的相关搭建,这里就简单将位置列出来即可,若感兴趣可以进入博客详细学习:小曾博客。
eureka-server:
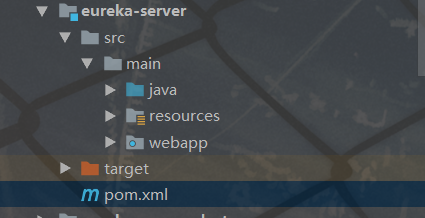
pom.xml:
1
2
3
4
5
6
7
8
9
10
11
12
13
14
15
16
17
18
19
20
21
22
23
24
25
26
27
28
29
30
31
| <parent>
<groupId>org.springframework.boot</groupId>
<artifactId>spring-boot-starter-parent</artifactId>
<version>2.0.6.RELEASE</version>
</parent>
<dependencyManagement>
<dependencies>
<dependency>
<groupId>org.springframework.cloud</groupId>
<artifactId>spring-cloud-dependencies</artifactId>
<version>Finchley.SR2</version>
<type>pom</type>
<scope>import</scope>
</dependency>
</dependencies>
</dependencyManagement>
<dependencies>
<dependency>
<groupId>org.springframework.cloud</groupId>
<artifactId>spring-cloud-starter-netflix-eureka-server</artifactId>
<version>2.1.3.RELEASE</version>
</dependency>
<dependency>
<groupId>org.springframework.boot</groupId>
<artifactId>spring-boot-starter-security</artifactId>
<version>2.2.1.RELEASE</version>
</dependency>
</dependencies>
|
application.properties配置:
1
2
3
4
5
6
7
8
9
10
11
12
13
14
15
16
17
18
19
20
21
22
23
| # 服务器端口
server.port=8010
# 服务应用名称
spring.application.name=eureka-server
# 此应用为注册中心,false:不向注册中心注册自己。
eureka.client.register-with-eureka = false
# 注册中心职责是维护服务实例,false:不检索服务。
eureka.client.fetch-registry=false
eureka.client.service-url.defaultZone=http:
# spring-security的配置信息:
spring.security.user.name=xiaozeng
spring.security.user.password=123456
#eureka.instance.prefer-ip-address=true
# eureka.instance.status-page-url=www.baidu.com
eureka.server.enableSelfPreservation=false
|
因为会集成Spring Security,所以在配置文件中必须添加下面两行代码,不添加的话会报401的权限错误:
1
2
3
| # spring-security的配置信息:
spring.security.user.name=xiaozeng
spring.security.user.password=123456
|
主启动类:
1
2
3
4
5
6
7
8
9
10
11
12
13
14
| package com.self.eurekaserver;
import org.springframework.boot.SpringApplication;
import org.springframework.boot.autoconfigure.SpringBootApplication;
import org.springframework.cloud.netflix.eureka.server.EnableEurekaServer;
@EnableEurekaServer
@SpringBootApplication
public class EurekaServerApplication {
public static void main(String[] args) {
SpringApplication.run(EurekaServerApplication.class,args);
}
}
|
下面是Security的相关配置类:
1
2
3
4
5
6
7
8
9
10
11
12
13
14
15
16
17
18
19
20
| package com.self.eurekaserver.config;
import org.springframework.context.annotation.Configuration;
import org.springframework.security.config.annotation.web.builders.HttpSecurity;
import org.springframework.security.config.annotation.web.configuration.EnableWebSecurity;
import org.springframework.security.config.annotation.web.configuration.WebSecurityConfigurerAdapter;
@Configuration
@EnableWebSecurity
public class WebSecurityConfig extends WebSecurityConfigurerAdapter {
@Override
protected void configure(HttpSecurity http) throws Exception {
http.csrf().disable();
http.authorizeRequests().anyRequest().authenticated().and().httpBasic();
}
}
|
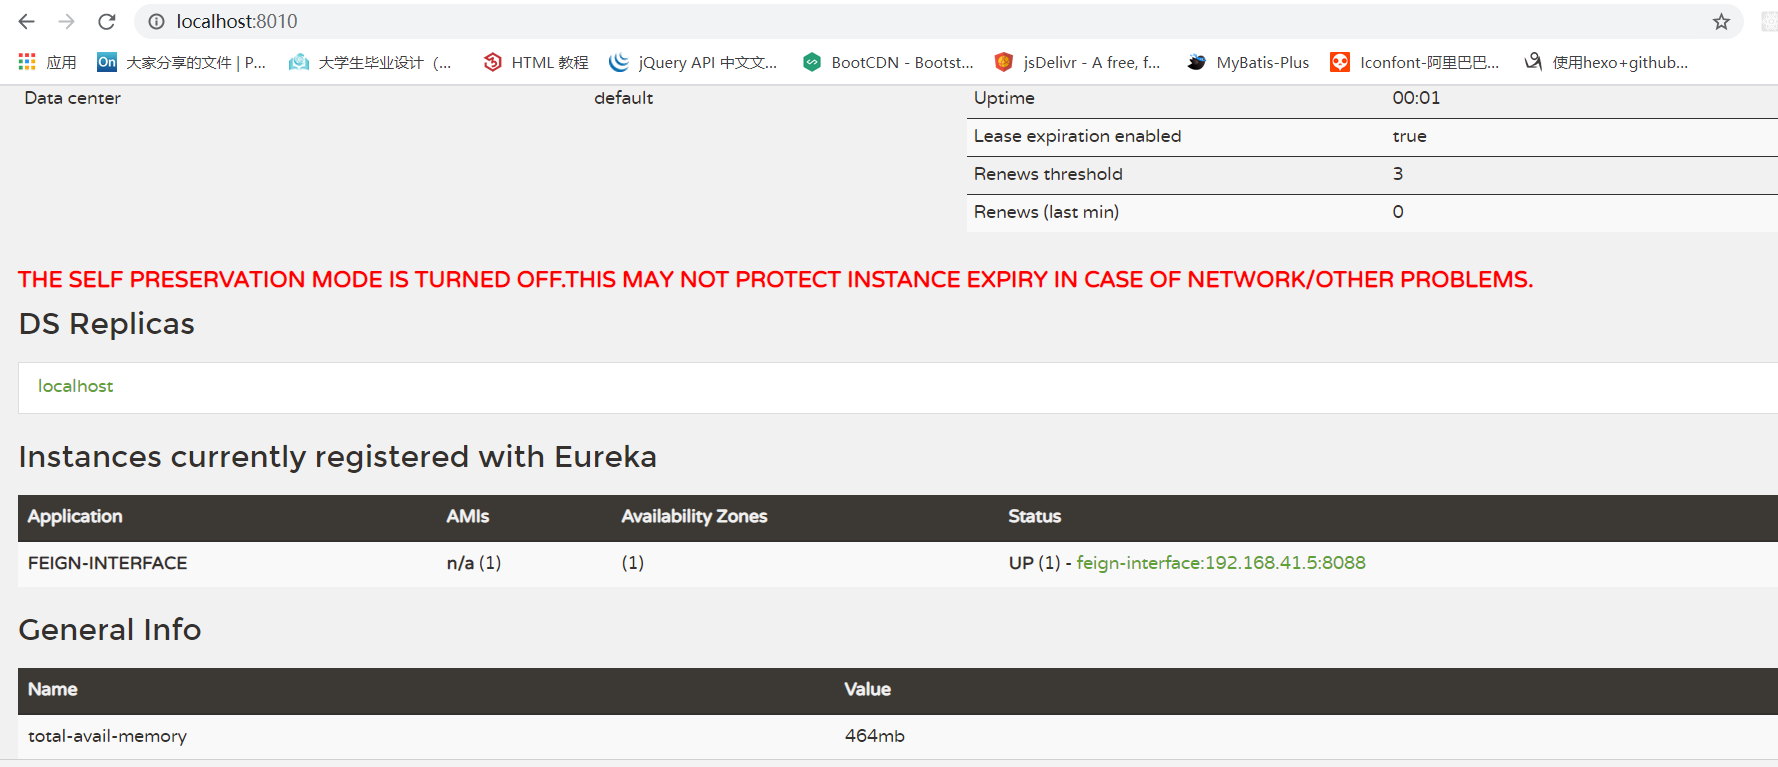
至此,Eureka-server注册中心就搭建成功了,启动项目,访问http://localhost:8010即可登录Eureka的Web页面。
下面就是进入feign的正式学习:
在Spring Cloud 中集成Feign 的步骤相当简单,首先还是创建项目feign-interface,并加入相关的依赖,如下:
1
2
3
4
5
6
7
8
9
10
11
12
13
14
15
16
17
18
19
20
21
22
23
24
25
26
27
28
29
30
31
32
33
34
35
36
| <parent>
<groupId>org.springframework.boot</groupId>
<artifactId>spring-boot-starter-parent</artifactId>
<version>2.0.6.RELEASE</version>
</parent>
<dependencyManagement>
<dependencies>
<dependency>
<groupId>org.springframework.cloud</groupId>
<artifactId>spring-cloud-dependencies</artifactId>
<version>Finchley.SR2</version>
<type>pom</type>
<scope>import</scope>
</dependency>
</dependencies>
</dependencyManagement>
<dependencies>
<dependency>
<groupId>org.springframework.cloud</groupId>
<artifactId>spring-cloud-starter-netflix-eureka-server</artifactId>
<version>2.1.3.RELEASE</version>
</dependency>
<dependency>
<groupId>org.springframework.boot</groupId>
<artifactId>spring-boot-starter-security</artifactId>
<version>2.2.1.RELEASE</version>
</dependency>
<dependency>
<groupId>org.springframework.cloud</groupId>
<artifactId>spring-cloud-starter-openfeign</artifactId>
<version>2.2.0.RELEASE</version>
</dependency>
</dependencies>
|
编写application.propeties配置文件:
1
2
3
4
5
6
7
8
9
10
11
12
13
14
15
16
17
18
19
20
| # 服务器端口
server.port=8088
# 服务应用名称
spring.application.name=feign-interface
# Eureka注册中心地址
eureka.client.service-url.defaultZone=http:
# 使用IP注册
eureka.instance.prefer-ip-address=true
# 定义实例ID格式
eureka.instance.instance-id=${spring.application.name}:${spring.cloud.client.ip-address}:${server.port}
eureka.instance.status-page-url=http:
spring.security.user.name=xiaozeng
spring.security.user.password=123456
|
启动类:
1
2
3
4
5
6
7
8
9
10
11
12
13
14
| package com.self.feign;
import org.springframework.boot.SpringApplication;
import org.springframework.boot.autoconfigure.SpringBootApplication;
import org.springframework.cloud.openfeign.EnableFeignClients;
@SpringBootApplication(exclude = {org.springframework.boot.autoconfigure.security.servlet.SecurityAutoConfiguration.class})
@EnableFeignClients
public class FeignInterfaceApplication {
public static void main(String[] args) {
SpringApplication.run(FeignInterfaceApplication.class,args);
}
}
|
在启动类上添加@EnableFeignClients注解,如果你的Feign接口定义跟你启动类不在同一包名下,还需要制定扫描的包名@EnableFeignClients(basePackages=”com.self.xxxx”)。在上面的@SpringBootApplication注解中排除了org.springframework.boot.autoconfigure.security.servlet.SecurityAutoConfiguration.class ,是为了解决Security的一个权限问题,如果不排除这个自动配置,将会报401的权限问题。
因为是将这个模块注册到Eureka注册中心,然后客户端调用带模块的接口返回数据,所以必须在此模块中创建相应的接口:
1
2
3
4
5
6
7
8
9
10
11
12
13
14
| package com.self.feign.controller;
import org.springframework.web.bind.annotation.GetMapping;
import org.springframework.web.bind.annotation.RestController;
@RestController
public class DemoController {
@GetMapping("/user/hello")
public String hello(){
return "Hello Welcome to Study Feign~~~";
}
}
|
到了这里,启动Eureka注册中心,和feign-interface就可以将模块注册进注册中心。
上面的步骤就是创建一个注册中心,并且将服务接口提供者已经注册到了注册中心,那么,既然已经有了服务的提供者,那么必须要有人去使用把??所以下面咱就来创建feign-invoke模块调用服务提供者提供的接口:
pom.xml :
1
2
3
4
5
6
7
8
9
10
11
12
13
14
15
16
17
18
19
20
21
22
23
24
25
26
27
28
29
30
31
32
33
34
35
36
| <parent>
<groupId>org.springframework.boot</groupId>
<artifactId>spring-boot-starter-parent</artifactId>
<version>2.0.6.RELEASE</version>
</parent>
<dependencyManagement>
<dependencies>
<dependency>
<groupId>org.springframework.cloud</groupId>
<artifactId>spring-cloud-dependencies</artifactId>
<version>Finchley.SR2</version>
<type>pom</type>
<scope>import</scope>
</dependency>
</dependencies>
</dependencyManagement>
<dependencies>
<dependency>
<groupId>org.springframework.cloud</groupId>
<artifactId>spring-cloud-starter-netflix-eureka-server</artifactId>
<version>2.1.3.RELEASE</version>
</dependency>
<dependency>
<groupId>org.springframework.boot</groupId>
<artifactId>spring-boot-starter-security</artifactId>
<version>2.2.1.RELEASE</version>
</dependency>
<dependency>
<groupId>org.springframework.cloud</groupId>
<artifactId>spring-cloud-starter-openfeign</artifactId>
<version>2.2.0.RELEASE</version>
</dependency>
</dependencies>
|
application.properties配置文件 :
1
2
3
4
5
6
7
8
9
10
11
12
13
14
15
16
17
18
19
20
| # 服务器端口
server.port=8099
# 服务应用名称
spring.application.name=feign-invoke
# Eureka注册中心地址
eureka.client.service-url.defaultZone=http:
# 使用IP注册
eureka.instance.prefer-ip-address=true
# 定义实例ID格式
eureka.instance.instance-id=${spring.application.name}:${spring.cloud.client.ip-address}:${server.port}
eureka.instance.status-page-url=http:
spring.security.user.name=xiaozeng
spring.security.user.password=123456
|
启动类:
1
2
3
4
5
6
7
8
9
10
11
12
13
14
15
16
| package com.self.feign;
import org.springframework.boot.SpringApplication;
import org.springframework.boot.autoconfigure.SpringBootApplication;
import org.springframework.cloud.client.discovery.EnableDiscoveryClient;
import org.springframework.cloud.openfeign.EnableFeignClients;
@SpringBootApplication
@EnableDiscoveryClient
@EnableFeignClients
public class FeignApplication {
public static void main(String[] args) {
SpringApplication.run(FeignApplication.class,args);
}
}
|
当我们写到这,服务调用者的基本配置已经完成。启动项目就可以将模块注册进注册中心:

如果需要调用服务提供者提供的接口,那么在调用端这里必须要获取提供者暴露出来的接口信息,因此需要在调用端创建一个DemoRemoteClient接口,标识一下服务提供者暴露的接口路径等信息:
1
2
3
4
5
6
7
8
9
10
11
12
13
| package com.self.feign.client;
import org.springframework.cloud.openfeign.FeignClient;
import org.springframework.stereotype.Component;
import org.springframework.web.bind.annotation.GetMapping;
@FeignClient(value = "feign-interface")
@Component
public interface DemoRemoteClient {
@GetMapping("/user/hello")
public String hello();
}
|
最后我们可以测试一下,使用调用端的DemoRemoteClient对象调用服务提供者提供的hello接口:
1
2
3
4
5
6
7
8
9
10
11
12
13
14
15
16
17
18
19
20
21
| package com.self.feign.controller;
import com.self.feign.client.DemoRemoteClient;
import org.springframework.beans.factory.annotation.Autowired;
import org.springframework.web.bind.annotation.GetMapping;
import org.springframework.web.bind.annotation.RestController;
@RestController
public class TestController {
@Autowired
private DemoRemoteClient demoRemoteClient;
@GetMapping("/callHello")
public String callHello() {
String result = demoRemoteClient.hello();
System.out.println("远程调用结果:" + result);
return result;
}
}
|
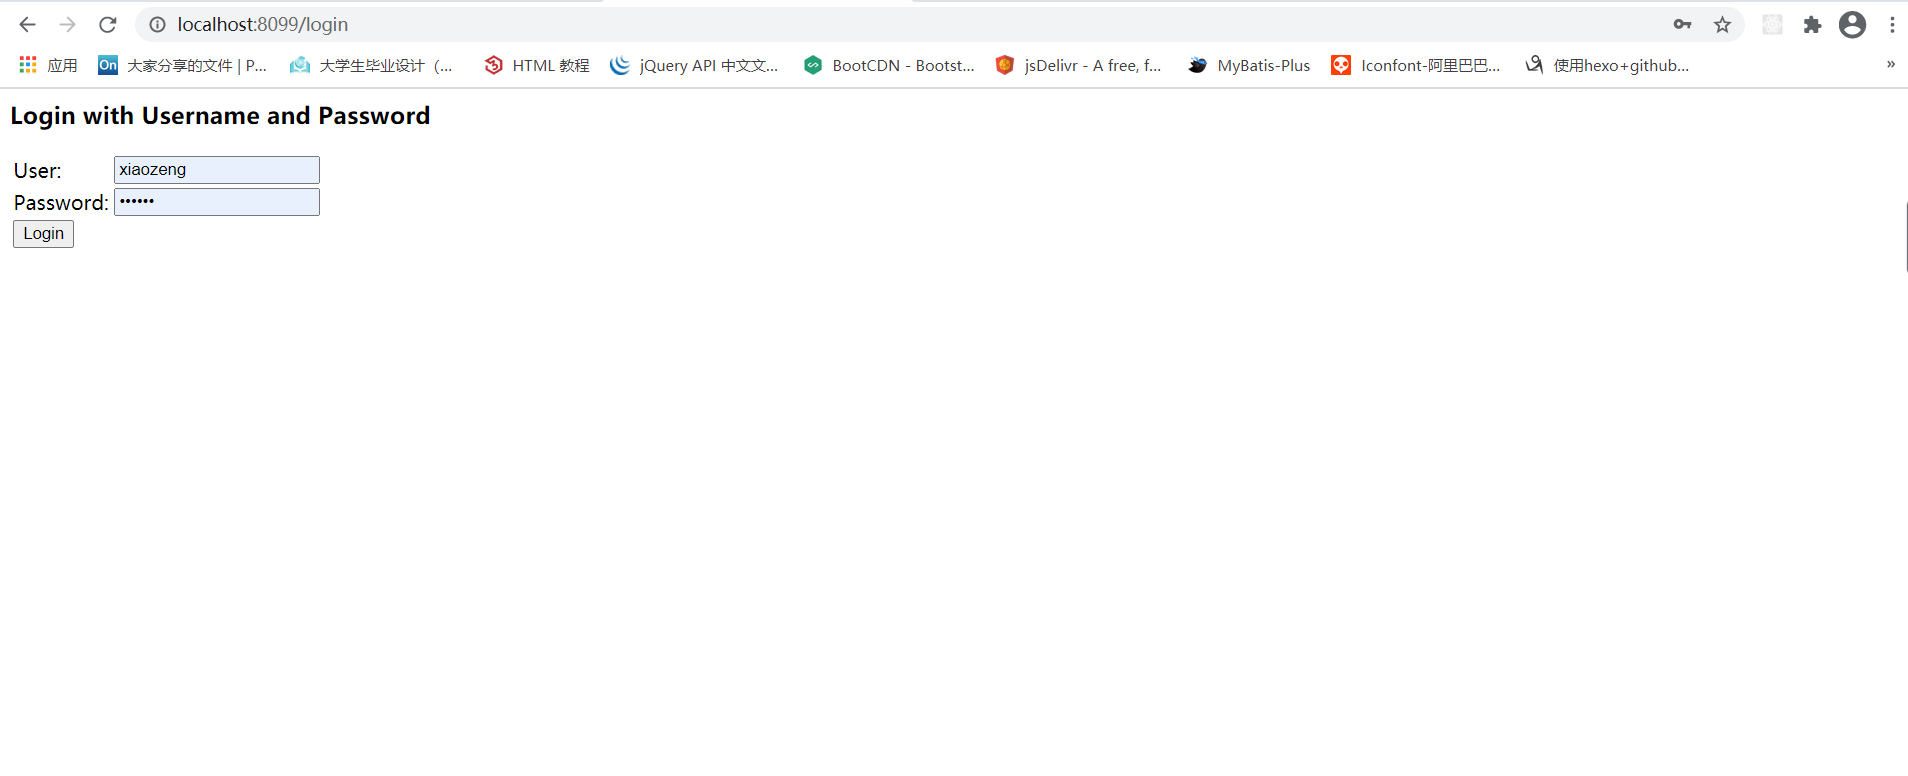
当模块都启动后,访问http://localhost:8099/callHello时,由于配置了Spring Security的原因,所以需要将配置文件的用户名密码填写登录才可以访问:
登录后可以发现页面返回数据:
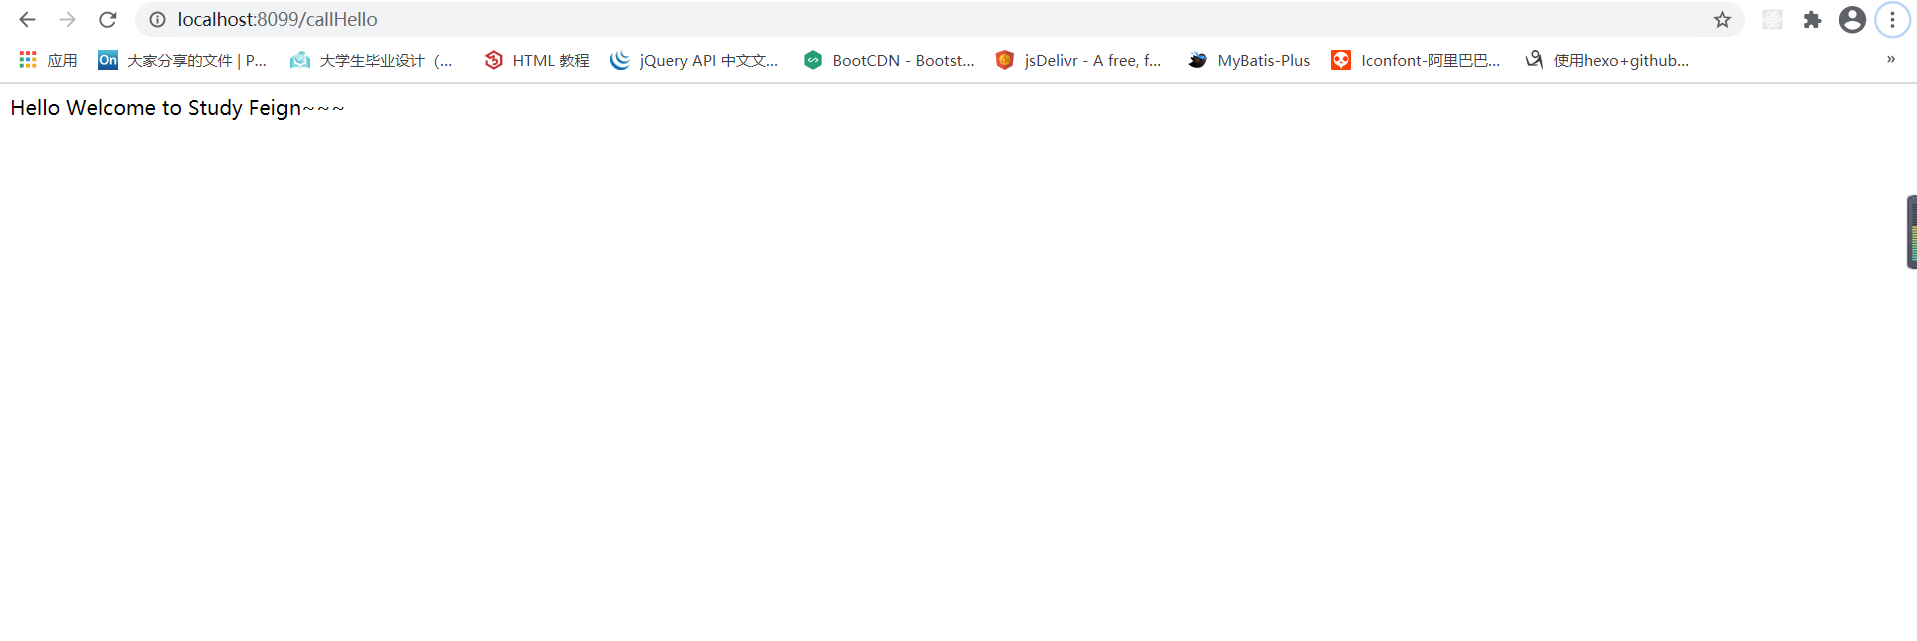
控制台也会有对应的输出:
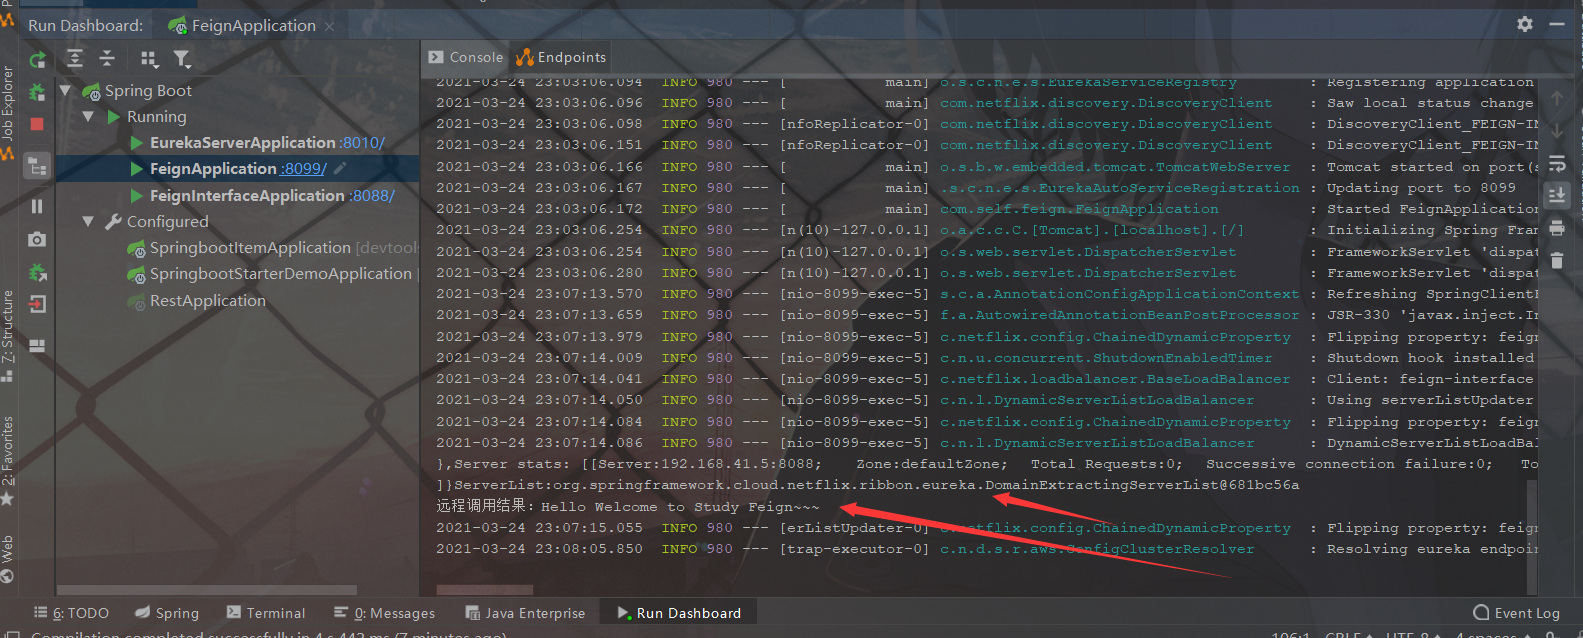
【注意:在客户端(服务调用者)接口上加@FeignClient注解,就相当于标识这是一个Feign客户端,value的属性就是对应的服务名称,也就是你需要调用那个服务的接口。】
定义方法时直接复制接口的定义即可,这样做的好处就是,每写一个接口就要对应写一个调用的Client,后面打成公共的jar,这样无论是哪个项目需要调用接口,只要引入公共的接口SDK jar 即可,不用重新定义一遍了。
2. Feign自定义配置
Feign提供了很多的的扩展机制,让用户可以更加灵活的使用,下面就一起来学习Feign的一些自定义配置。
2.1 日志配置
在进行接口调用时,比如接口调用失败,参数没收到等问题,或者想看看调用的性能,就需要配置Feign的日志,让Feign把请求信息输出出来。
首先定义一个配置类,获取日志级别,代码如下:
1
2
3
4
5
6
7
8
9
10
11
12
13
14
| package com.self.feign.config;
import feign.Logger;
import org.springframework.context.annotation.Bean;
import org.springframework.context.annotation.Configuration;
@Configuration
public class FeignConfig {
@Bean
public Logger.Level feignLoggerLevel(){
return Logger.Level.FULL;
}
}
|
Feign 的Level日志级别有4种,分别是:
- NONE:不输出日志。
- BASIC:只输出请求方法的URL和响应的状态码以及接口执行的时间。
- HEADERS:将BASIC信息和请求头信息输出。
- FULL:输出完整的请求信息。
配置类建好后,我们需要在Feign Client(服务调用方)中的@FeignClient注解中指定使用的配置类,代码如下:
1
2
3
4
5
6
7
8
9
10
11
12
13
14
| package com.self.feign.client;
import com.self.feign.config.FeignConfig;
import org.springframework.cloud.openfeign.FeignClient;
import org.springframework.stereotype.Component;
import org.springframework.web.bind.annotation.GetMapping;
@FeignClient(value = "feign-interface",configuration = FeignConfig.class)
@Component
public interface DemoRemoteClient {
@GetMapping("/user/hello")
public String hello();
}
|
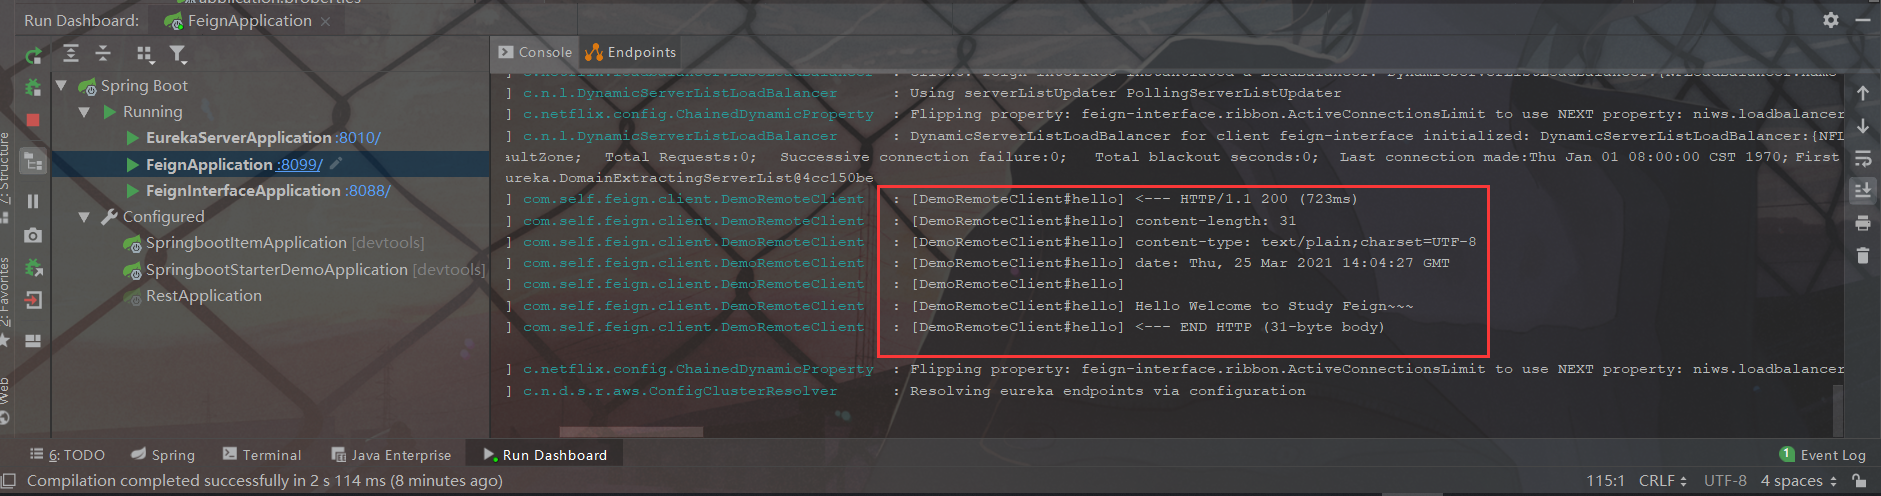
在配置文件中执行Client的日志级别才能正确的输出日志,格式是”logging.level.client类地址=级别”。
1
| logging.level.com.self.feign.client.DemoRemoteClient=DEBUG
|
最后,通过Feign的客户端8099端口去调用/callHello,就可以看到控制台输出的调用信息,如下图:
2.2 契约配置
其实,原生的Feign是不支持Spring MVC注解的,只是因为Spring Cloud 在Feign的基础上做了扩展,才使Feign支持Spring MVC的注解来调用。
如果你想在Spring Cloud中使用原生的注解方式来定义客户端也是可以的,通过配置契约来改变这个配置,Spring Cloud中默认的是SpringMvcContract,代码如下:
1
2
3
4
5
6
7
8
9
10
11
12
13
14
15
16
17
18
19
20
| package com.self.feign.config;
import feign.Contract;
import feign.Logger;
import org.springframework.context.annotation.Bean;
import org.springframework.context.annotation.Configuration;
@Configuration
public class FeignConfig {
@Bean
public Logger.Level feignLoggerLevel(){
return Logger.Level.FULL;
}
@Bean
public Contract feignContract(){
return new Contract.Default();
}
}
|
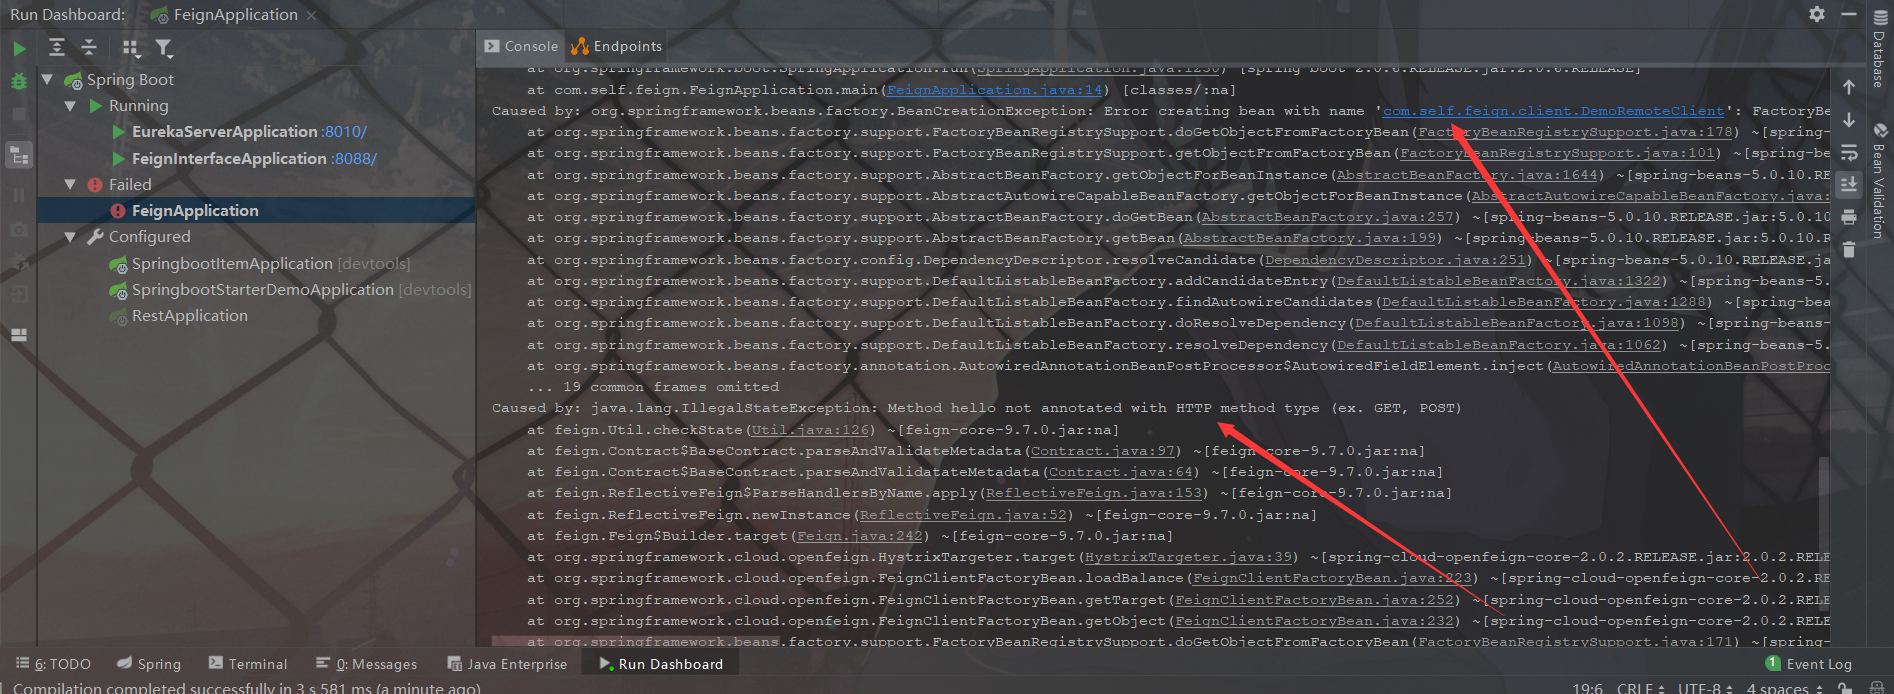
当配置了默认契约之后,之前定义的Client就用不了了,因为之前上面的注解都是Spring MVC的注解。
效果如下图:
2.3 Basic 认证配置
通常我们调用的接口都是有权限控制的,很多时候可能认证的值是通过参数去传递的,还有就是通过请求头去传递认证信息,比如Basic认证方式。在Feign中我们可以直接配置Basic认证,代码如下:
1
2
3
4
5
6
7
| @Configuration
public class FeignConfig {
@Bean
public BasicAuthRequestInterceptor basicAuthRequestInterceptor() {
return new BasicAuthRequestInterceptor("user", "password");
}
}
|
或者你可以自定义属于自己的认证方式,其实就是自定义一个请求拦截器。在请求之前做认证操作,然后往请求头中设置认证之后的信息。通过实现RequestIntercepter接口来自定义认证方式,代码如下:
1
2
3
4
5
6
7
8
9
10
11
12
13
14
15
16
| package com.self.feign.interceptor;
import feign.RequestInterceptor;
import feign.RequestTemplate;
public class FeignBasicAuthRequestInterceptor implements RequestInterceptor {
public FeignBasicAuthRequestInterceptor(){
}
@Override
public void apply(RequestTemplate requestTemplate) {
System.out.println("进入请求拦截,用户名密码认证~~~");
}
}
|
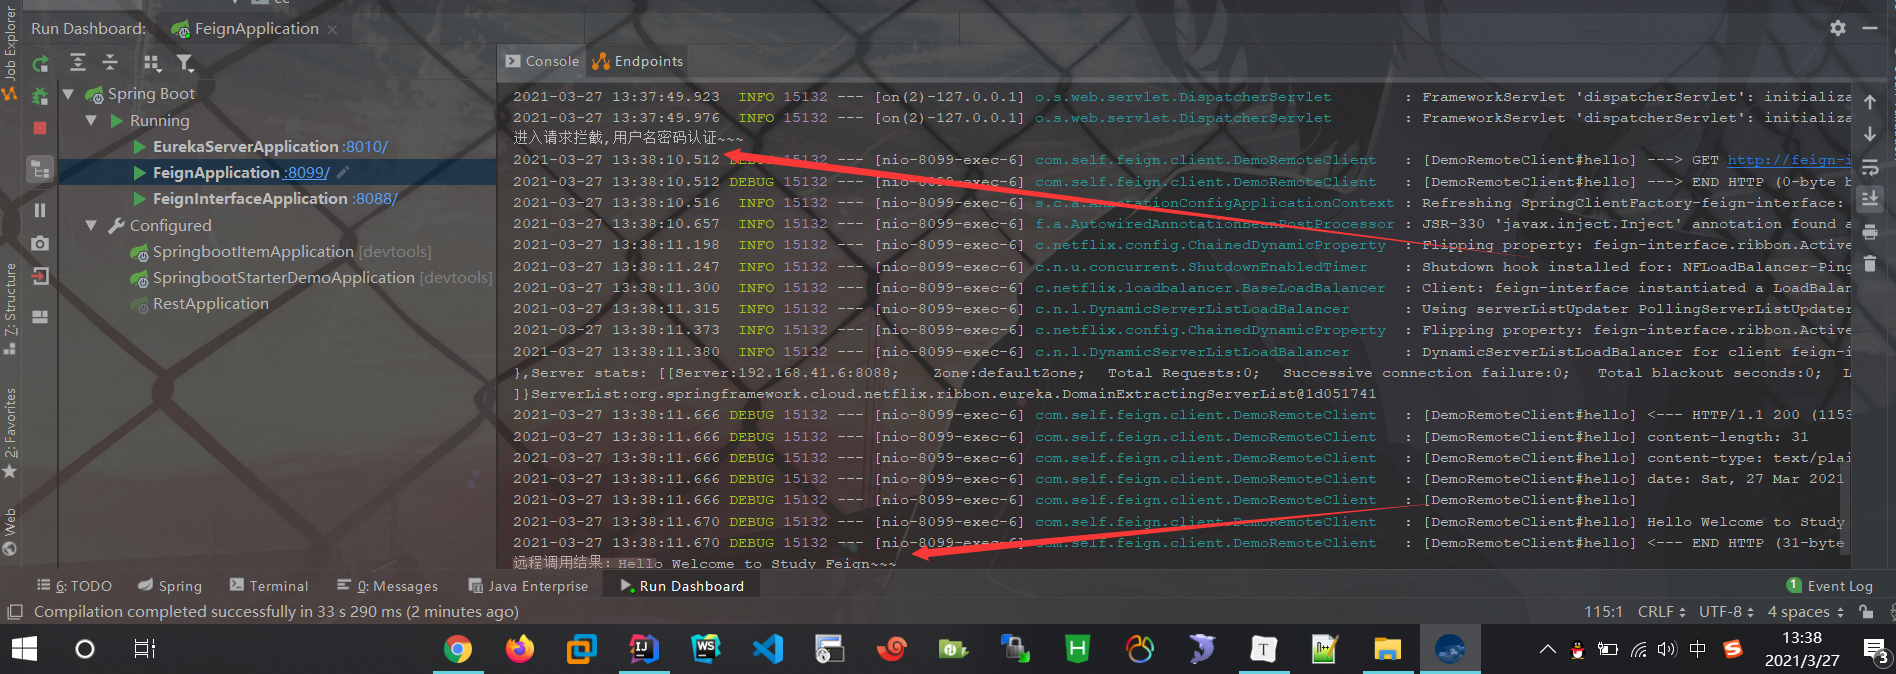
然后将配置改成我们自定义的就可以了,这样当Feign去请求接口的时候,每次请求之前都会进入FeignBasicAuthRequestInterceptor的apply方法中,在在里面就可以做属于你的逻辑了,代码如下:
1
2
3
4
5
6
7
| @Configuration
public class FeignConfig {
@Bean
public FeignBasicAuthRequestInterceptor basicAuthRequestInterceptor() {
return new FeignBasicAuthRequestInterceptor();
}
}
|
尝试去访问8099下的callHello接口后,控制台会输出以下结果:
2.4 超时时间配置
通过Options可以配置连接超时时间和读取超时时间(代码如下),Options的第一个参数是连接超时时间(ms),默认值是10 × 1000;第二个是读取超时时间(ms),默认值是60 × 1000。
1
2
3
4
5
6
7
| @Configuration
public class FeignConfig {
@Bean
public Request.Options options() {
return new Request.Options(5000, 10000);
}
}
|
2.5 客户端组件配置
Feign中默认使用JDK原生的URLConnection发送HTTP请求,我们可以集成别的组件来替换掉URLConnection,比如Apache HttpClient,OkHttp。
配置 OkHttp 只需要加入OkHttp 的依赖,代码如下:
1
2
3
4
| <dependency>
<groupId>io.github.openfeign</groupId>
<artifactId>feign-okhttp</artifactId>
</dependency>
|
然后修改配置,将Feign的 HttpClient 禁用,启用OkHttp,配置如下:
1
2
3
| #feign 使用 okhttp
feign.httpclient.enabled=false
feign.okhttp.enabled=true
|
关于配置可参考源码org.springframework.cloud.openfeign.FeignAutoConfiguration。
HttpClient自动配置源码如下:
1
2
3
4
5
6
7
8
9
10
11
12
13
14
15
16
| @Configuration
@ConditionalOnClass(ApacheHttpClient.class)
@ConditionalOnMissingClass("com.netflix.loadbalancer.ILoadBalancer")
@ConditionalOnProperty(value = "feign.httpclient.enabled", matchIfMissing = true)
protected static class HttpClientFeignConfiguration {
@Autowired(required = false)
private HttpClient httpClient;
@Bean
@ConditionalOnMissingBean(Client.class)
public Client feignClient() {
if (this.httpClient != null) {
return new ApacheHttpClient(this.httpClient);
}
return new ApacheHttpClient();
}
}
|
OkHttp 自动配置源码如下所示:
1
2
3
4
5
6
7
8
9
10
11
12
13
14
15
16
| @Configuration
@ConditionalOnClass(OkHttpClient.class)
@ConditionalOnMissingClass("com.netflix.loadbalancer.ILoadBalancer")
@ConditionalOnProperty(value = "feign.okhttp.enabled", matchIfMissing = true)
protected static class OkHttpFeignConfiguration {
@Autowired(required = false)
private okhttp3.OkHttpClient okHttpClient;
@Bean
@ConditionalOnMissingBean(Client.class)
public Client feignClient() {
if (this.okHttpClient != null) {
return new OkHttpClient(this.okHttpClient);
}
return new OkHttpClient();
}
}
|
上面所示两段代码分别是配置 HttpClient 和 OkClient 的方法。其通过@ConditionalOnProperty中的值来决定启用哪种客户端(HTTPClient 和 OkHttp),@ConditionalOnClass 表示对应的类在 classpath 目录下存在时,才会去解析对应的配置文件。
2.6 使用配置自定义Feign 的配置
除了使用代码的方式来对Feign进行配置,我们还可以通过配置文件的方式来指定 Feign 的配置。
1
2
3
4
5
6
7
8
9
10
11
12
13
14
15
16
17
| # 连接超时时间
feign.client.config.feignName.connectTimeout=5000
# 读取超时时间
feign.client.config.feignName.readTimeout=5000
# 日志等级
feign.client.config.feignName.loggerLevel=full
# 重试
feign.client.config.feignName.retryer=com.xxx.xxxRetryer
# 拦截器
feign.client.config.feignName.requestInterceptors[0]=com.xxx.xxxRequestInterceptor
feign.client.config.feignName.requestInterceptors[1]=com.xxx.xxxRequestInterceptor
# 编码器
feign.client.config.feignName.encoder=com.xxx.xxxEncoder
# 解码器
feign.client.config.feignName.decoder=com.xxx.xxxDecoder
# 契约
feign.client.config.feignName.contract=com.xxx.xxxContract
|
2.7 继承特性
Feign 的继承特性可以让服务的接口定义单独抽出来,作为公关的依赖,以方便使用。
创建一个 Maven 项目,feign-inherit-api,用于存放API接口的定义,增加Feign 的依赖,代码如下:
1
2
3
4
| <dependency>
<groupId>org.springframework.cloud</groupId>
<artifactId>spring-cloud-starter-openfeign</artifactId>
</dependency>
|
定义接口,指定服务名称,代码如下:
1
2
3
4
5
| @FeignClient("feign-inherit-provider")
public interface UserRemoteClient {
@GetMapping("/user/name")
String getName();
}
|
创建一个服务提供者feign-inherit-provider,引入feign-inherit-api,代码如下:
1
2
3
4
5
| <dependency>
<groupId>net.biancheng</groupId>
<artifactId>feign-inherit-api</artifactId>
<version>0.0.1-SNAPSHOT</version>
</dependency>
|
实现UserRemoteClient 接口,代码如下:
1
2
3
4
5
6
7
| @RestController
public class DemoController implements UserRemoteClient {
@Override
public String getName() {
return "xiaozeng";
}
}
|
创建一个服务消费者feign-inherit-consumer,同样需要引入feign-inherit-api,用于调用feign-inherit-provider提供的/user/name 接口,代码如下:
1
2
3
4
5
6
7
8
9
10
| @RestController
public class UserController {
@Autowired
private UserRemoteClient userRemoteClient;
@GetMapping("/call")
public String callHello() {
String result = userRemoteClient.getName();
System.out.println("getName调用结果:" + result);
}
}
|
通过将接口的定义单独抽取出来,服务提供者去实现接口,服务消费者直接就可以引入定义好的接口进行调用,非常方便。
2.8 多参数请求构造
多参数请求构造分为GET 请求 和POST 请求两种方式,首先来看GET请求的多参数请求构造方式,代码如下:
1
2
| @GetMapping("/user/info")
public String getUserInfo(@RequestParam("name")String name,@RequestParam("age")int age);
|
另一种是通过Map来传递参数,参数数量可以动态的改变,个人是不建议使用Map进行传参的(Map传递参数最大的问题就是可以随意传参)。代码如下:
1
2
| @GetMapping("/user/detail")
public String getUserDetail(@RequestParam Map<String, Object> param);
|
POST 请求多参数就定义一个参数类,通过@RequestBody 注解的方式来实现,代码如下:
1
2
| @PostMapping("/user/add")
public String addUser(@RequestBody User user);
|
实现类中也需要加上@RequestBody 注解,代码如下:
1
2
3
4
5
6
7
| @RestController
public class UserController implements UserRemoteClient {
@Override
public String addUser(@RequestBody User user) {
return user.getName();
}
}
|
【注意:使用继承特性的时候,实现类也需要加上@RequestBody 注解】。
至此,Feign的基本使用已经结束……