1. SpringBoot的简介 Spring Boot其设计目的是简化Spring应用的初始搭建以及开发过程,省去了创建Web项目的一系列配置文件的编写。
Spring Boot是通过Starter的方式轻松集成第三方的框架,去掉XML的配置,全部使用注解代替。
Spring Boot开发的优点:
基于Spring开发Web应用更加容易。
采用基于注解方式的配置,避免了编写大量重复的XML配置
可以轻松集成Spring家族的其他框架,比如Spring JDBC、Spring Data 等。
提供嵌入式服务器,令开发和部署都变得非常方便。
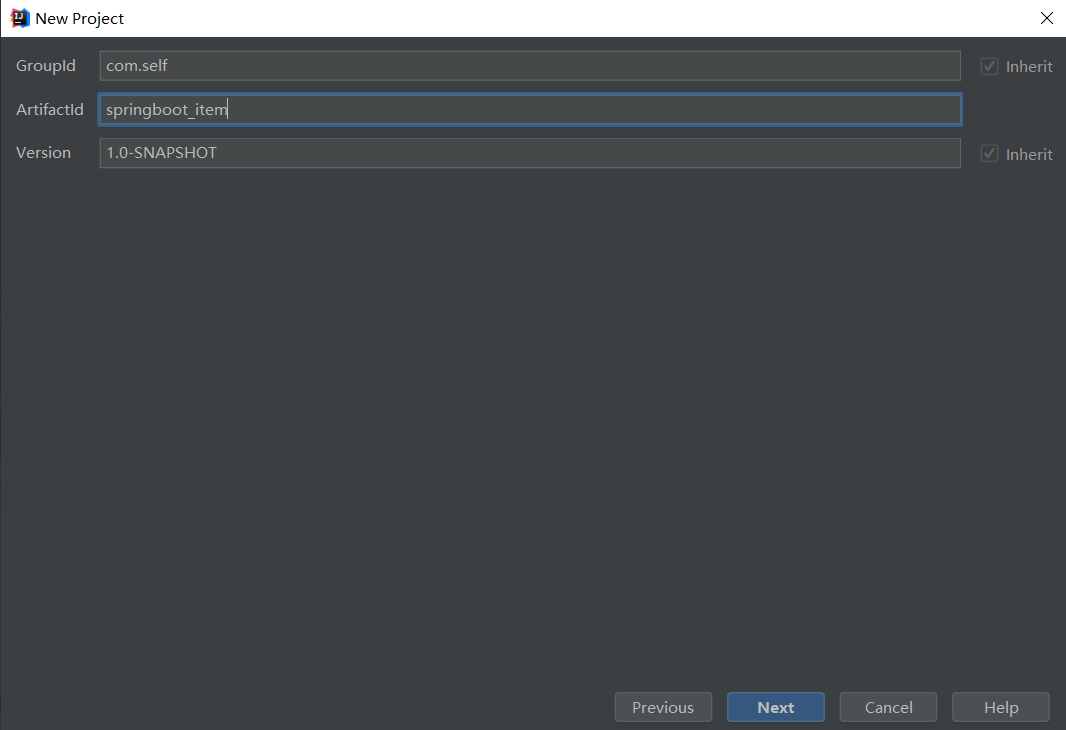
2. 搭建SpringBoot项目 先使用IDEA开发工具搭建一个有webapp骨架的Maven工程,相关信息如下:
完成上述操作之后,在pom.xml中添加Springboot依赖,代码如下:
1
2
3
4
5
6
7
8
9
10
11
<parent> <groupId>org.springframework.boot</groupId> <artifactId>spring-boot-starter-parent</artifactId> <version>2.0.6.RELEASE</version> </parent> <dependencies> <dependency> <groupId>org.springframework.boot</groupId> <artifactId>spring-boot-starter-web</artifactId> </dependency> </dependencies>
编写启动类,代码如下:
1
2
3
4
5
6
7
8
9
10
11
12
13
14
package com.self.springboot_item;import org.springframework.boot.SpringApplication;import org.springframework.boot.autoconfigure.SpringBootApplication;@SpringBootApplication public class SpringbootItemApplication public static void main (String[] args) SpringApplication.run(SpringbootItemApplication.class , args ) ; } }
启动类使用了@SpringBootApplication注解,这个注解表示该类是一个 Spring Boot应用。
编写controller ,创建第一个REST接口:
1
2
3
4
5
6
7
8
9
10
11
12
13
14
15
package com.self.springboot_item.controller;import org.springframework.web.bind.annotation.GetMapping;import org.springframework.web.bind.annotation.RequestMapping;import org.springframework.web.bind.annotation.RestController;@RestController @RequestMapping ("/demo" )public class DemoController @GetMapping ("/hello" ) public String hello () return "Hello world" ; } }
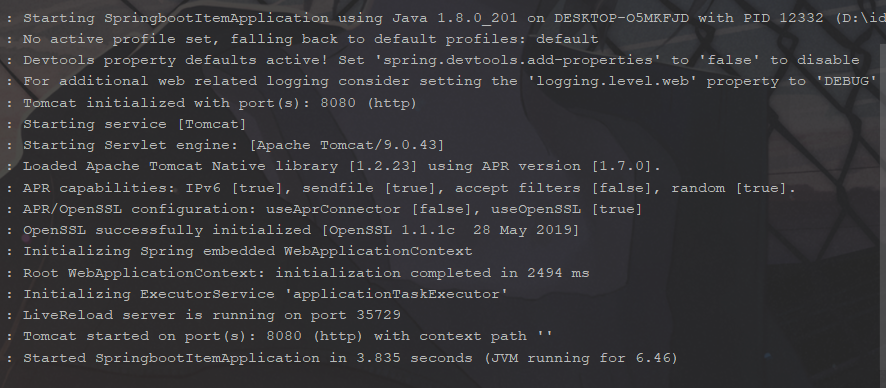
然后直接运行main类即可启动,启动成功后控制台输出信息,默认端口为8080,如图所示:
可以看到,我们只在pom.xml中引入了一个Web的starter,然后创建一个普通的Java类,一个Main方法就可以启动一个Web项目。
之所以可以通过一个Main启动一个Web服务,是因为Spring Boot中内嵌了Tomcat,然后通过内嵌的Tomcat来提供服务,当然,我们也可以使用别的容器来替换Tomcat,比如Undertow或者Jetty。
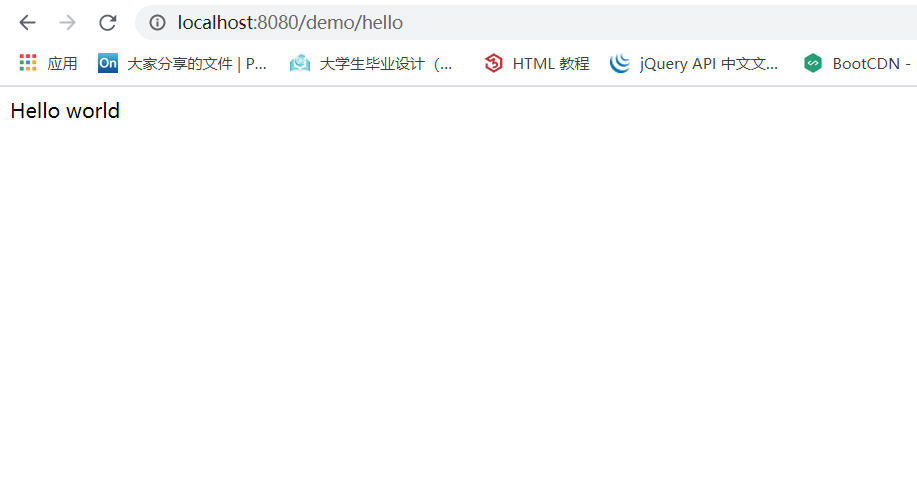
根据上边写的REST接口,访问地址使用/demo/hello:
其中@RestController是Controller和@ResponseBody的组合注解,可以直接返回JSON数据。
@GetMapping其实就是@RequestMapping(method = RequestMethod.GET),用过地址就可以看到输出的结果”hello world”。
2.1 读取配置文件 在以前的项目中我们主要在XML文件中践行框架配置,业务的相关配置会放在属性文件中,然后通过一个属性读取的工具类来读取配置信息。
在Spring Boot 中我们不再需要使用这种方式读取数据了。Spring Boot中的配置通常放在application.properties或者application.yml中,读取配置信息非常方便,总共分为3中方式。
首先,在application.properties中定义端口号:
1) Environment
可以通过Environment的getProperty方法来获取想要的配置信息,代码如下:
1
2
3
4
5
6
7
8
9
10
11
12
13
14
15
16
17
18
19
20
21
22
23
package com.self.springboot_item.controller;import org.springframework.beans.factory.annotation.Autowired;import org.springframework.core.env.Environment;import org.springframework.web.bind.annotation.GetMapping;import org.springframework.web.bind.annotation.RequestMapping;import org.springframework.web.bind.annotation.RestController;@RestController @RequestMapping ("/demo" )public class DemoController @Autowired private Environment env; @GetMapping ("/hello" ) public String hello () String port = env.getProperty("server.port" ); return port; } }
2) @Value
可以注入具体的配置信息,代码如下:
1
2
3
4
5
6
7
8
9
10
11
12
13
14
15
16
17
18
19
package com.self.springboot_item.controller;import org.springframework.beans.factory.annotation.Value;import org.springframework.web.bind.annotation.GetMapping;import org.springframework.web.bind.annotation.RequestMapping;import org.springframework.web.bind.annotation.RestController;@RestController @RequestMapping ("/demo" )public class DemoController @Value ("${server.port}" ) private String port; @GetMapping ("/hello" ) public String hello () return port; } }
3) 自定义配置类
首先在application.properties中定义name属性:
prefix定义配置的前缀,代码如下:
1
2
3
4
5
6
7
8
9
10
11
12
13
14
15
16
17
18
19
package com.self.springboot_item.config;import org.springframework.boot.context.properties.ConfigurationProperties;import org.springframework.stereotype.Component;@ConfigurationProperties (prefix = "myself" )@Component public class MyConfig private String name; public String getName () return name; } public void setName (String name) this .name = name; } }
读取配置的方法代码如下:
1
2
3
4
5
6
7
8
9
10
11
12
13
14
15
16
17
18
19
20
package com.self.springboot_item.controller;import com.self.springboot_item.config.MyConfig;import org.springframework.beans.factory.annotation.Autowired;import org.springframework.web.bind.annotation.GetMapping;import org.springframework.web.bind.annotation.RequestMapping;import org.springframework.web.bind.annotation.RestController;@RestController @RequestMapping ("/demo" )public class DemoController @Autowired private MyConfig config; @GetMapping ("/hello" ) public String hello () return config.getName(); } }
2.2 profiles多环境配置 在平时的开发中,项目会被部署到开发环境、测试环境、生产环境,但是每个环境的数据库地址等信息都是不一样的。通过profile来激活不同环境下的配置文件就能解决配置信息不一样的问题。在Spring Boot 中可以通过spring.profiles.active=dev来激活不同环境的配置。
可以定义多个配置文件,每个配置文件对应一个环境,格式为application-环境.properties,如图所示:
文件
功能
application.properties
通用配置,不区分环境
application-dev.properties
开发环境
application-test.properties
测试环境
application-prod.properties
生产环境
2.3 actuator监控 Spring Boot提供了一个用于监控和管理自身应用信息的模块,它就是spring-boot-starter-actuator。该模板使用起来非常简单,只需要添加依赖即可,代码如下所示:
1
2
3
4
<dependency> <groupId>org.springframework.boot</groupId> <artifactId>spring-boot-starter-actuator</artifactId> </dependency>
actuator模块提供许多端点,通过访问这些端点我们可以得到很多监控信息。
比如,访问/actuator/health可以得到下面的信息:
UP表示当前应用处于健康状态,如果是DOWN就表示当前应用不健康。增加下面配置可以让一些健康信息的详情也显示出来:
1 management.endpoint.health.show-details=ALWAYS
当再次访问/actuator/health,就可以得到健康状态的详细信息:
1 2 3 4 5 6 7 8 9 10 11 12 13 14 15 16 17 { "status" :"UP" , "components" :{ "diskSpace" :{ "status" :"UP" , "details" :{ "total" :524287995904 , "free" :461191016448 , "threshold" :10485760 , "exists" :true } }, "ping" :{ "status" :"UP" } } }
除了暴露/actuator/health端点信息,actuator还有很多的端点,例如下列:
Http方法
路径
描述
Http默认暴露
GET
/actuator/conflgprops
查看配置属性,包含默认配置
false
GET
/actuator/beans
查看bean及其关系列表
false
GET
/actuator/heapdump
打印线程栈
false
GET
/actuator/env
查看所有环境变量
false
GET
/actuator/env/{name}
查看具体变量值
false
GET
/actuator/health
查看应用健康指标
false
GET
/actuator/info
查看应用信息
false
GET
/actuator/mappings
查看所有URL映射
false
GET
/actuator/metrics
查看应用基本指标
false
GET
/actuator/metrics/{name}
查看具体指标
false
GET
/actuator/shutdown
关闭应用
false
GET
/actuator/httptrace
查看基本追踪信息
false
GET
/actuator/loggers
显示应用程序中loggers配置
false
GET
/actuator/scheduledtasks
显示定时任务
false
不过大部分端点默认都不会暴露出来,我们可以手动配置需要暴露的端点。如果需要暴露多个端点,可以用逗号分隔,如下所示:
1 management.endpoints.web.exposure.include=configprops,beans
如果想全部端点都暴露的话,直接配置成下面的方式:
1 management.endpoints.web.exposure.include=*
关于这些监控信息在这就不多赘述,大家可以自行了解。
2.3.1 自定义actuator端点 在很多情况下,我们需要自定义一些规则来判断应用的状态是否健康,可以采用自定义端点的方式满足多样性的需求。如果我们只是需要对应用的健康状态添加一些其他维度的数据,可以通过继承AbstractHealthIndicator来实现自己的业务逻辑。代码如下:
1 2 3 4 5 6 7 8 9 10 11 12 13 14 15 package com.self.springboot_item.config;import org.springframework.boot.actuate.health.AbstractHealthIndicator;import org.springframework.boot.actuate.health.Health;import org.springframework.stereotype.Component;@Component public class MyselfHealthIndicator extends AbstractHealthIndicator @Override protected void doHealthCheck (Health.Builder builder) throws Exception builder.up().withDetail("status" ,true ); } }
通过up方法指定应用的状态为健康,down方法指定应用的状态为不健康。withDetail方法用于添加一些详细信息。访问/actuator/health,可以得到我们自定义的健康状态详细信息:
1 2 3 4 5 6 7 8 9 10 11 12 13 14 15 16 17 18 19 20 21 22 23 { "status" :"UP" , "components" :{ "diskSpace" :{ "status" :"UP" , "details" :{ "total" :524287995904 , "free" :461190684672 , "threshold" :10485760 , "exists" :true } }, "myself" :{ "status" :"UP" , "details" :{ "status" :true } }, "ping" :{ "status" :"UP" } } }
上面我们是在框架自带的health端点中进行扩展,还有一种需求是完全开发一个全新的端点,比如查看当前登录的用户信息的端点,自定义全新的端点很简单,通过@Endpoint注解就可以实现。代码如下:
1 2 3 4 5 6 7 8 9 10 11 12 13 14 15 16 17 18 19 20 21 22 23 24 25 package com.self.springboot_item.config;import org.springframework.boot.actuate.endpoint.annotation.Endpoint;import org.springframework.boot.actuate.endpoint.annotation.ReadOperation;import org.springframework.stereotype.Component;import java.util.ArrayList;import java.util.HashMap;import java.util.List;import java.util.Map;@Component @Endpoint (id = "user" )public class UserEndpoint @ReadOperation public List<Map<String,Object>> health(){ ArrayList<Map<String, Object>> list = new ArrayList<>(); Map<String, Object> map = new HashMap<>(); map.put("userId" ,1001 ); map.put("userName" ,"xiaozeng" ); list.add(map); return list; } }
通过访问/actuator/user可以看到返回的用户信息如下:
1 2 3 4 5 6 [ { "userName" :"xiaozeng" , "userId" :1001 } ]
2.4 统一异常处理 对于接口的定义,我们通常会有一个固定格式,比如:
1 2 3 4 5 6 7 8 9 10 11 12 13 14 15 { "status" : true , "code" : 200 , "message" : null , "data" : [ { "id" : "101" , "name" : "jack" }, { "id" : "102" , "name" : "jason" } ] }
但是,如果调用方在请求我们的API时把接口地址写错了,就会得到一个404错误:
1 2 3 4 5 6 7 { "timestamp" : 1492063521109 , "status" : 404 , "error" : "Not Found" , "message" : "No message available" , "path" : "/rest11/auth" }
后端服务器会告诉我们哪个地址没找到,其实也挺友好的。但是因为我们上面自定义的数据格式跟下面的不一致,所以当用户拿到这个返回的时候是无法识别的,其中最明显的是status字段。
我们自定义的是boolean类型,用来表示请求是否成功,这里返回的就是Http的状态码,所以我们需要在发生这种系统错误时也能返回我们自定义的那种数据格式,那就要自定义一个异常处理类,通过这个类既可以返回统一的格式,也可以统一记录异常日志。代码如下:
1 2 3 4 5 6 7 8 9 10 11 12 13 14 15 16 17 18 19 20 21 22 23 24 25 26 27 28 29 30 31 32 33 34 35 36 package com.self.springboot_item.handler;import com.self.springboot_item.entities.ResponseData;import org.slf4j.Logger;import org.slf4j.LoggerFactory;import org.springframework.web.bind.annotation.ControllerAdvice;import org.springframework.web.bind.annotation.ExceptionHandler;import org.springframework.web.bind.annotation.ResponseBody;import org.springframework.web.servlet.NoHandlerFoundException;import javax.servlet.http.HttpServletRequest;@ControllerAdvice public class GlobalExceptionHandler private Logger logger = LoggerFactory.getLogger(GlobalExceptionHandler.class ) ; @ResponseBody @ExceptionHandler (value = Exception.class ) public ResponseData defaultErrorHandler (HttpServletRequest request ,Exception e ) { logger.error("" ,e); ResponseData responseData = new ResponseData(); responseData.setMessage(e.getMessage()); if (e instanceof NoHandlerFoundException){ responseData.setCode(404 ); }else { responseData.setCode(500 ); } responseData.setData(null ); responseData.setStatus(false ); return responseData; } }
ResponseData是我们返回格式的实体类,其发生错误时也会被捕获到,然后封装好返回格式并返回给调用方。最后关键的一步就是,在Spring Boot的配置文件中添加如下配置:
1 2 3 4 # 出现错误时, 直接抛出异常 spring.mvc.throw -exception-if -no-handler-found=true # 不要为我们工程中的资源文件建立映射 spring.resources.add-mappings=false
然后当我们调用一个不存在的接口时,返回的错误信息就是我们自定义的那种格式了:
1 2 3 4 5 6 { "status" :false , "code" :404 , "message" :"No handler found for GET /a" , "data" :null }
最后贴上ResponseData的定义,代码如下:
1 2 3 4 5 6 7 8 9 10 package com.self.springboot_item.entities;public class ResponseData private Boolean status = true ; private int code = 200 ; private String message; private Object data; }
2.5 异步执行 异步调用就是不用等待结果的返回就执行后面的逻辑;同步调用则需要等待结果的返回再执行后面的逻辑。
通常我们使用异步操作时都会创建一个线程执行一段逻辑,然后把这个线程丢到线程池中去执行,代码如下:
1 2 3 4 5 6 7 8 9 ExecutorService executorService = Executors.newFixedThreadPool(10 ); executorService.execute(() -> { try { } catch (Exception e) { e.printStackTrace(); } finally { } });
这种方式尽管使用了Lambda,但看起来没那么优雅。在Spring中有一种更加简单的方式来执行异步操作,只需要一个@Async注解即可,代码如下:
1 2 3 4 @Async public void saveLog () System.err.println(Thread.currentThread().getName()); }
我们可以直接在controller中调用这个业务方法,它就是异步执行的,会在默认的线程池中去执行。需要注意的是,一定要在外部的类中调用这个方法,如果在在本类调用则不起作用,比如this.saveLog()。最后在启动类上开启异步任务的执行,添加@EnableAsync注解即可。
另外,关于执行异步任务的线程池我们也可以自定义,首先我们定义一个线程池的配置类,用来配置一些参数,代码如下:
1
2
3
4
5
6
7
8
9
10
11
12
13
14
15
16
17
18
19
20
21
22
23
24
25
package com.self.springboot_item.config;import org.springframework.boot.context.properties.ConfigurationProperties;import org.springframework.stereotype.Component;@Component @ConfigurationProperties (prefix = "spring.task.pool" )public class TaskThreadPoolConfig private int corePoolSize = 5 ; private int maxPoolSize = 50 ; private int keepAliveSeconds = 60 ; private int queueCapacity = 10000 ; private String threadNamePrefix = "SPR-AsyncTask-" ; }
然后我们重新定义线程池的配置,代码如下:
1 2 3 4 5 6 7 8 9 10 11 12 13 14 15 16 17 18 19 20 21 22 23 24 25 26 27 28 29 30 31 32 33 34 35 36 37 38 39 40 41 42 43 44 45 46 47 48 49 50 package com.self.springboot_item.config;import org.slf4j.Logger;import org.slf4j.LoggerFactory;import org.springframework.aop.interceptor.AsyncUncaughtExceptionHandler;import org.springframework.beans.factory.annotation.Autowired;import org.springframework.scheduling.annotation.AsyncConfigurer;import org.springframework.scheduling.concurrent.ThreadPoolTaskExecutor;import org.springframework.stereotype.Component;import java.lang.reflect.Method;import java.util.concurrent.Executor;import java.util.concurrent.ThreadPoolExecutor;@Component public class AsyncTaskExecutePool implements AsyncConfigurer private Logger logger = LoggerFactory.getLogger(AsyncTaskExecutePool.class ) ; @Autowired private TaskThreadPoolConfig config; public Executor getAsyncExecutor () ThreadPoolTaskExecutor executor = new ThreadPoolTaskExecutor(); executor.setCorePoolSize(config.getCorePoolSize()); executor.setMaxPoolSize(config.getMaxPoolSize()); executor.setQueueCapacity(config.getQueueCapacity()); executor.setKeepAliveSeconds(config.getKeepAliveSeconds()); executor.setThreadNamePrefix(config.getThreadNamePrefix()); executor.setRejectedExecutionHandler(new ThreadPoolExecutor.CallerRunsPolicy()); executor.initialize(); return executor; } @Override public AsyncUncaughtExceptionHandler getAsyncUncaughtExceptionHandler () return new AsyncUncaughtExceptionHandler() { @Override public void handleUncaughtException (Throwable throwable, Method method, Object... objects) logger.error("===============" + throwable.getMessage() + "============" ); logger.error("exception method : " + method.getName()); } }; } }
配置完之后,这异步任务执行的线程池就是我们自定义的了,我们可以在属性文件里配置线程池的大小等信息,也可以使用默认的配置:
1 spring.task.pool.maxPoolSize=100
最后讲一下线程池配置的拒绝策略。当我们的线程数量高于线程池的处理速度时,任务会被缓存到本地的队列中。队列也是有大小的,如果超过了这个大小,就需要有拒绝的策略,不然就会出现内存溢出。目前支持两种拒绝策略:
AbortPolicy :直接抛出java.util.concurrent.RejectedExecutionException异常。
CallerRunsPolicy : 主线程直接执行该任务,执行完之后尝试添加下一个任务到线程池中,这样可以有效降低线程池内添加任务的速度。
建议大家用CallerRunsPolicy策略,因为当队列中的任务满了之后,如果直接抛异常,那么这个任务就会被丢弃。如果是CallerRunsPolicy策略,则会用主线程去执行,也就是同步执行,这样操作最起码任务不会被丢弃。
2.6 随机端口 在实际的开发过程中,每个项目的端口都是定好的,通过server.port可以指定端口。
当一个服务想要启动多个实例时,就需要改变端口,特别是在我们后面进行Spring Cloud学习的时候,服务都会注册到注册中心里去,为了能够让服务随时都可以扩容,在服务启动的时候能随机生成一个可以使用的端口是最好不过的。
在Spring Boot中,可以通过${random}来生成随机数字,我们可以这样使用:
1 server.port=${random.int [2000 ,8000 ]}
通过random.in方法,指定随机数的访问,生成一个在2000到8000之间的数字,这样每次启动的端口就都不一样了。
其实上面的方法虽然能够达到预期的效果,但是也会存在一些问题:如果这个端口已经在使用了,那么启动必然会报错。所以我们可以考虑通过代码的方式来随机生成一个端口,然后检测是否被使用,这样就能生成一个没有被使用的端口。
编写一个启动参数设置类,代码如下:
1 2 3 4 5 6 7 8 9 10 11 12 13 14 15 16 17 18 19 20 21 22 23 24 25 26 27 28 29 30 31 32 33 34 package com.self.springboot_item.config;import com.self.springboot_item.utils.ServerPortUtils;import org.slf4j.Logger;import org.slf4j.LoggerFactory;import org.springframework.util.StringUtils;public class StartCommand private Logger logger = LoggerFactory.getLogger(StartCommand.class ) ; public StartCommand (String[] args) Boolean isServerPort = false ; String serverPort = "" ; if (args != null ){ for (String arg : args) { if (StringUtils.hasText(arg) && arg.startsWith("--server.port" )){ isServerPort = true ; serverPort = arg; break ; } } } if (!isServerPort){ int port = ServerPortUtils.getAvailablePort(); logger.info("current server.port = " + port); System.setProperty("server.port" , String.valueOf(port)); }else { logger.info("current server.port = " + serverPort.split("=" )[1 ]); System.setProperty("server.port" ,serverPort.split("=" )[1 ]); } } }
通过对启动参数进行遍历判断,如果有指定启动端口,后续就不自动生成了;如果没有指定,就通过ServerPortUtils获取一个可以使用的端口,然后设置到环境变量中。在application.properties中通过下面的方式获取端口:
1 server.port=${server.port}
关于获取可用端口的代码如下:
1 2 3 4 5 6 7 8 9 10 11 12 13 14 15 16 17 18 19 package com.self.springboot_item.utils;import java.util.Random;public class ServerPortUtils public static int getAvailablePort () int min = 2000 ; int max = 65535 ; Random random = new Random(); int port = random.nextInt(max) % (max - min + 1 ) + min; boolean using = NetUtils.isLoclePortUsing(port); if (using){ return getAvailablePort(); }else { return port; } } }
1 2 3 4 5 6 7 8 9 10 11 12 13 14 15 16 17 18 19 20 21 22 23 24 25 26 27 28 29 30 31 package com.self.springboot_item.utils;import java.io.IOException;import java.net.InetAddress;import java.net.Socket;import java.net.UnknownHostException;public class NetUtils public static boolean isLoclePortUsing (int port) boolean flag = true ; try { flag = isPortUsing("127.0.0.1" , port); }catch (Exception e){ } return flag; } public static boolean isPortUsing (String host,int port) throws UnknownHostException boolean flag = false ; InetAddress theAddress = InetAddress.getByName(host); try { Socket socket = new Socket(theAddress,port); flag = true ; } catch (IOException e) { } return flag; } }
获取可用端口的主要逻辑是指定一个范围,然后生成随机数字,最后通过NetUtils来检查端口是否可用。如果获取到可用的端口则直接返回,没有获取到可用的端口则执行回调逻辑,重新获取。检验端口是否可用主要是用Socket来判断这个端口是否可以被连接。
最后在启动类中调用端口即可使用,代码如下:
1 2 3 4 5 6 7 8 9 10 11 12 13 14 15 package com.self.springboot_item;import com.self.springboot_item.config.StartCommand;import org.springframework.boot.SpringApplication;import org.springframework.boot.autoconfigure.SpringBootApplication;@SpringBootApplication public class SpringbootItemApplication public static void main (String[] args) new StartCommand(args); SpringApplication.run(SpringbootItemApplication.class , args ) ; } }
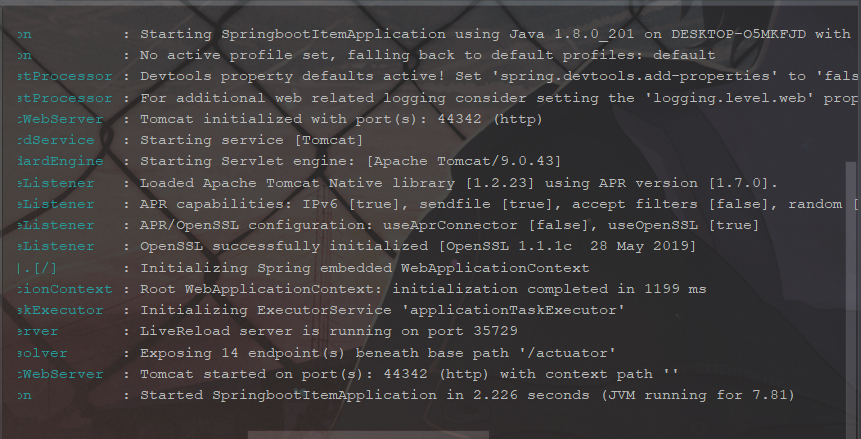
最后,这里随机生成的端口44342,如下图:
2.7 编译打包 传统的Web项目在部署的时候,是编译出一个war包放到Tomcat的webapps目录下。而在Spring Boot构建的Web项目中则打破了这一传统部署方式,他采用更加简单的内置容器方式来部署应用程序,只需要将应用编译打包成一个jar包,直接可以通过java -jar命令启动应用。
在pom.xml中添加打包的Maven插件,代码如下:
1 2 3 4 5 6 7 8 9 10 11 12 13 14 15 16 17 18 19 20 21 22 <build> <plugins> <plugin> <groupId>org.springframework.boot</groupId> <artifactId>spring-boot-maven-plugin</artifactId> <configuration> <executable>true</executable> <mainClass>com.self.springboot_item.SpringbootItemApplication</mainClass> </configuration> </plugin> <!-- 编译插件, 指定JDK版本 --> <plugin> <groupId>org.apache.maven.plugins</groupId> <artifactId>maven-compiler-plugin</artifactId> <configuration> <source>1.8</source> <target>1.8</target> </configuration> </plugin> </plugins> </build>
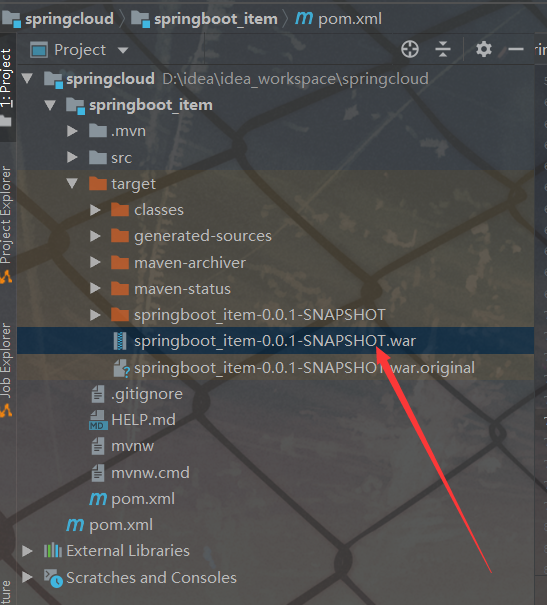
mainClass配置的是我们的启动入口类,配置完成后可以通过Maven 的 mvn clean package 命令进行编译打包操作。编译完成后在target目录下回生成对应的jar包,部署时直接调用java -jar xxx.jar即可启动应用。
结果如下图: